4. Build the stove walls by first piling mud around the four sides to a height equal to the length
from the base of the palm to the tip of the middle finger. Build the wall dividing the two pot
holes to the same height. Ensure that you maintain the ‘one palm’ wall thickness.
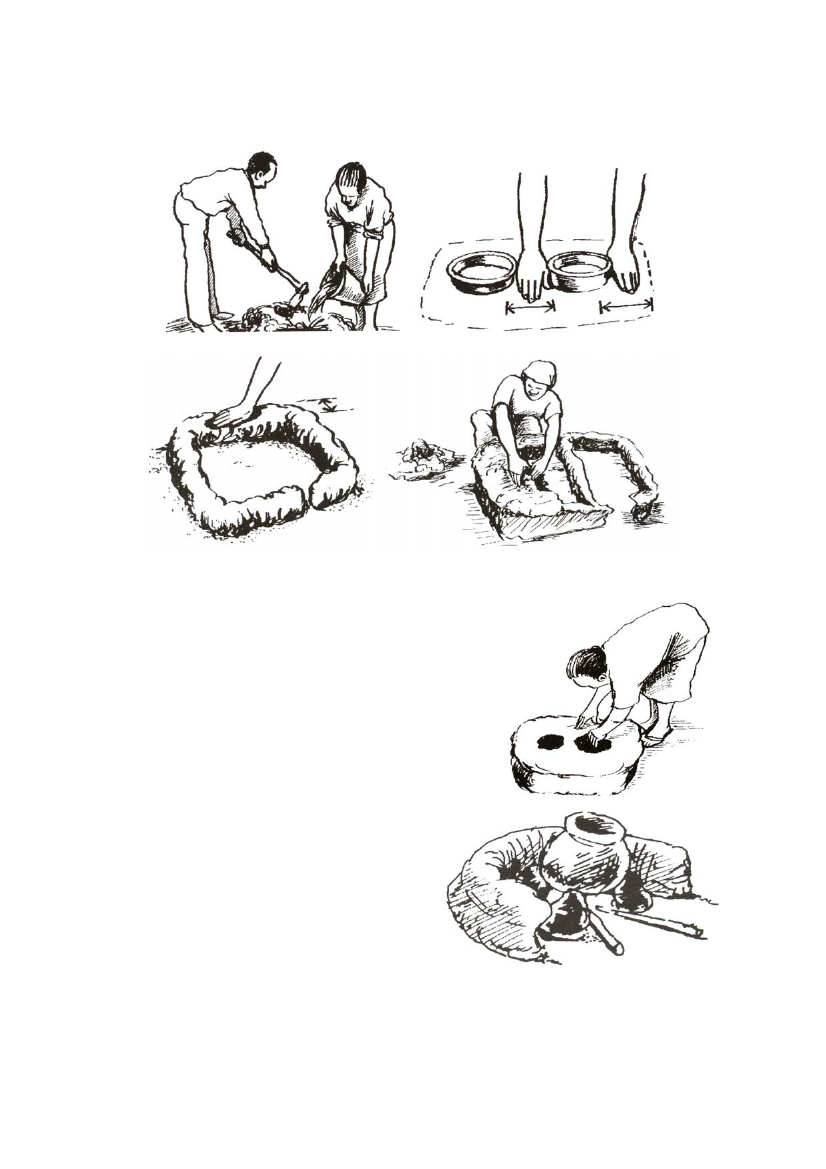
Figure 5.72 Mixing soil with water
Figure 5.73 Measuring pot hole positions
Figure 5.74 Measuring the width of the wall
Figure 5.75 Building the top of the stove
5. Build the top of the stove starting from the walls,
adding a little mud at a time. Leave space fro the pot
holes as you proceed.
6. Once the top is complete, smooth out the stove and
shapes the pot holes.
7. Cut the door using a knife. The door should be the size
of the palm placed horizontally with the fingers slightly
spread.
8. Let the stove dry for one week, repairing any cracks as
they appear.
9. Smear the stove with cow dung or ashes and leave for
another week before use.
Shielded Fires
Figure 5.76 Shaping the pot holes
The Rusinga stove
The Rusinga stove is an improvement of the three-
stone fire. Three stones are placed in position and
mud is used to cover two sides leaving a mud stove
with one door.
Materials used
Figure 5.77 The Rusinga stove
23